> ## Documentation Index
> Fetch the complete documentation index at: https://platform.kimi.com/docs/llms.txt
> Use this file to discover all available pages before exploring further.

# 使用控制台进行批量推理

批量推理允许你通过 Kimi 开放平台控制台提交大规模推理任务，无需编写代码。本教程将介绍如何在控制台中创建、监控和获取批量推理任务的结果。

<Note>
  批量推理针对于某一项目进行，只有 Tier1 及以上的用户可以使用批量推理。如果你更倾向于通过 API 进行批量处理，请参考 [Batch API 指南](/guide/use-batch-api)。
</Note>

## 操作步骤

### 1. 创建批任务

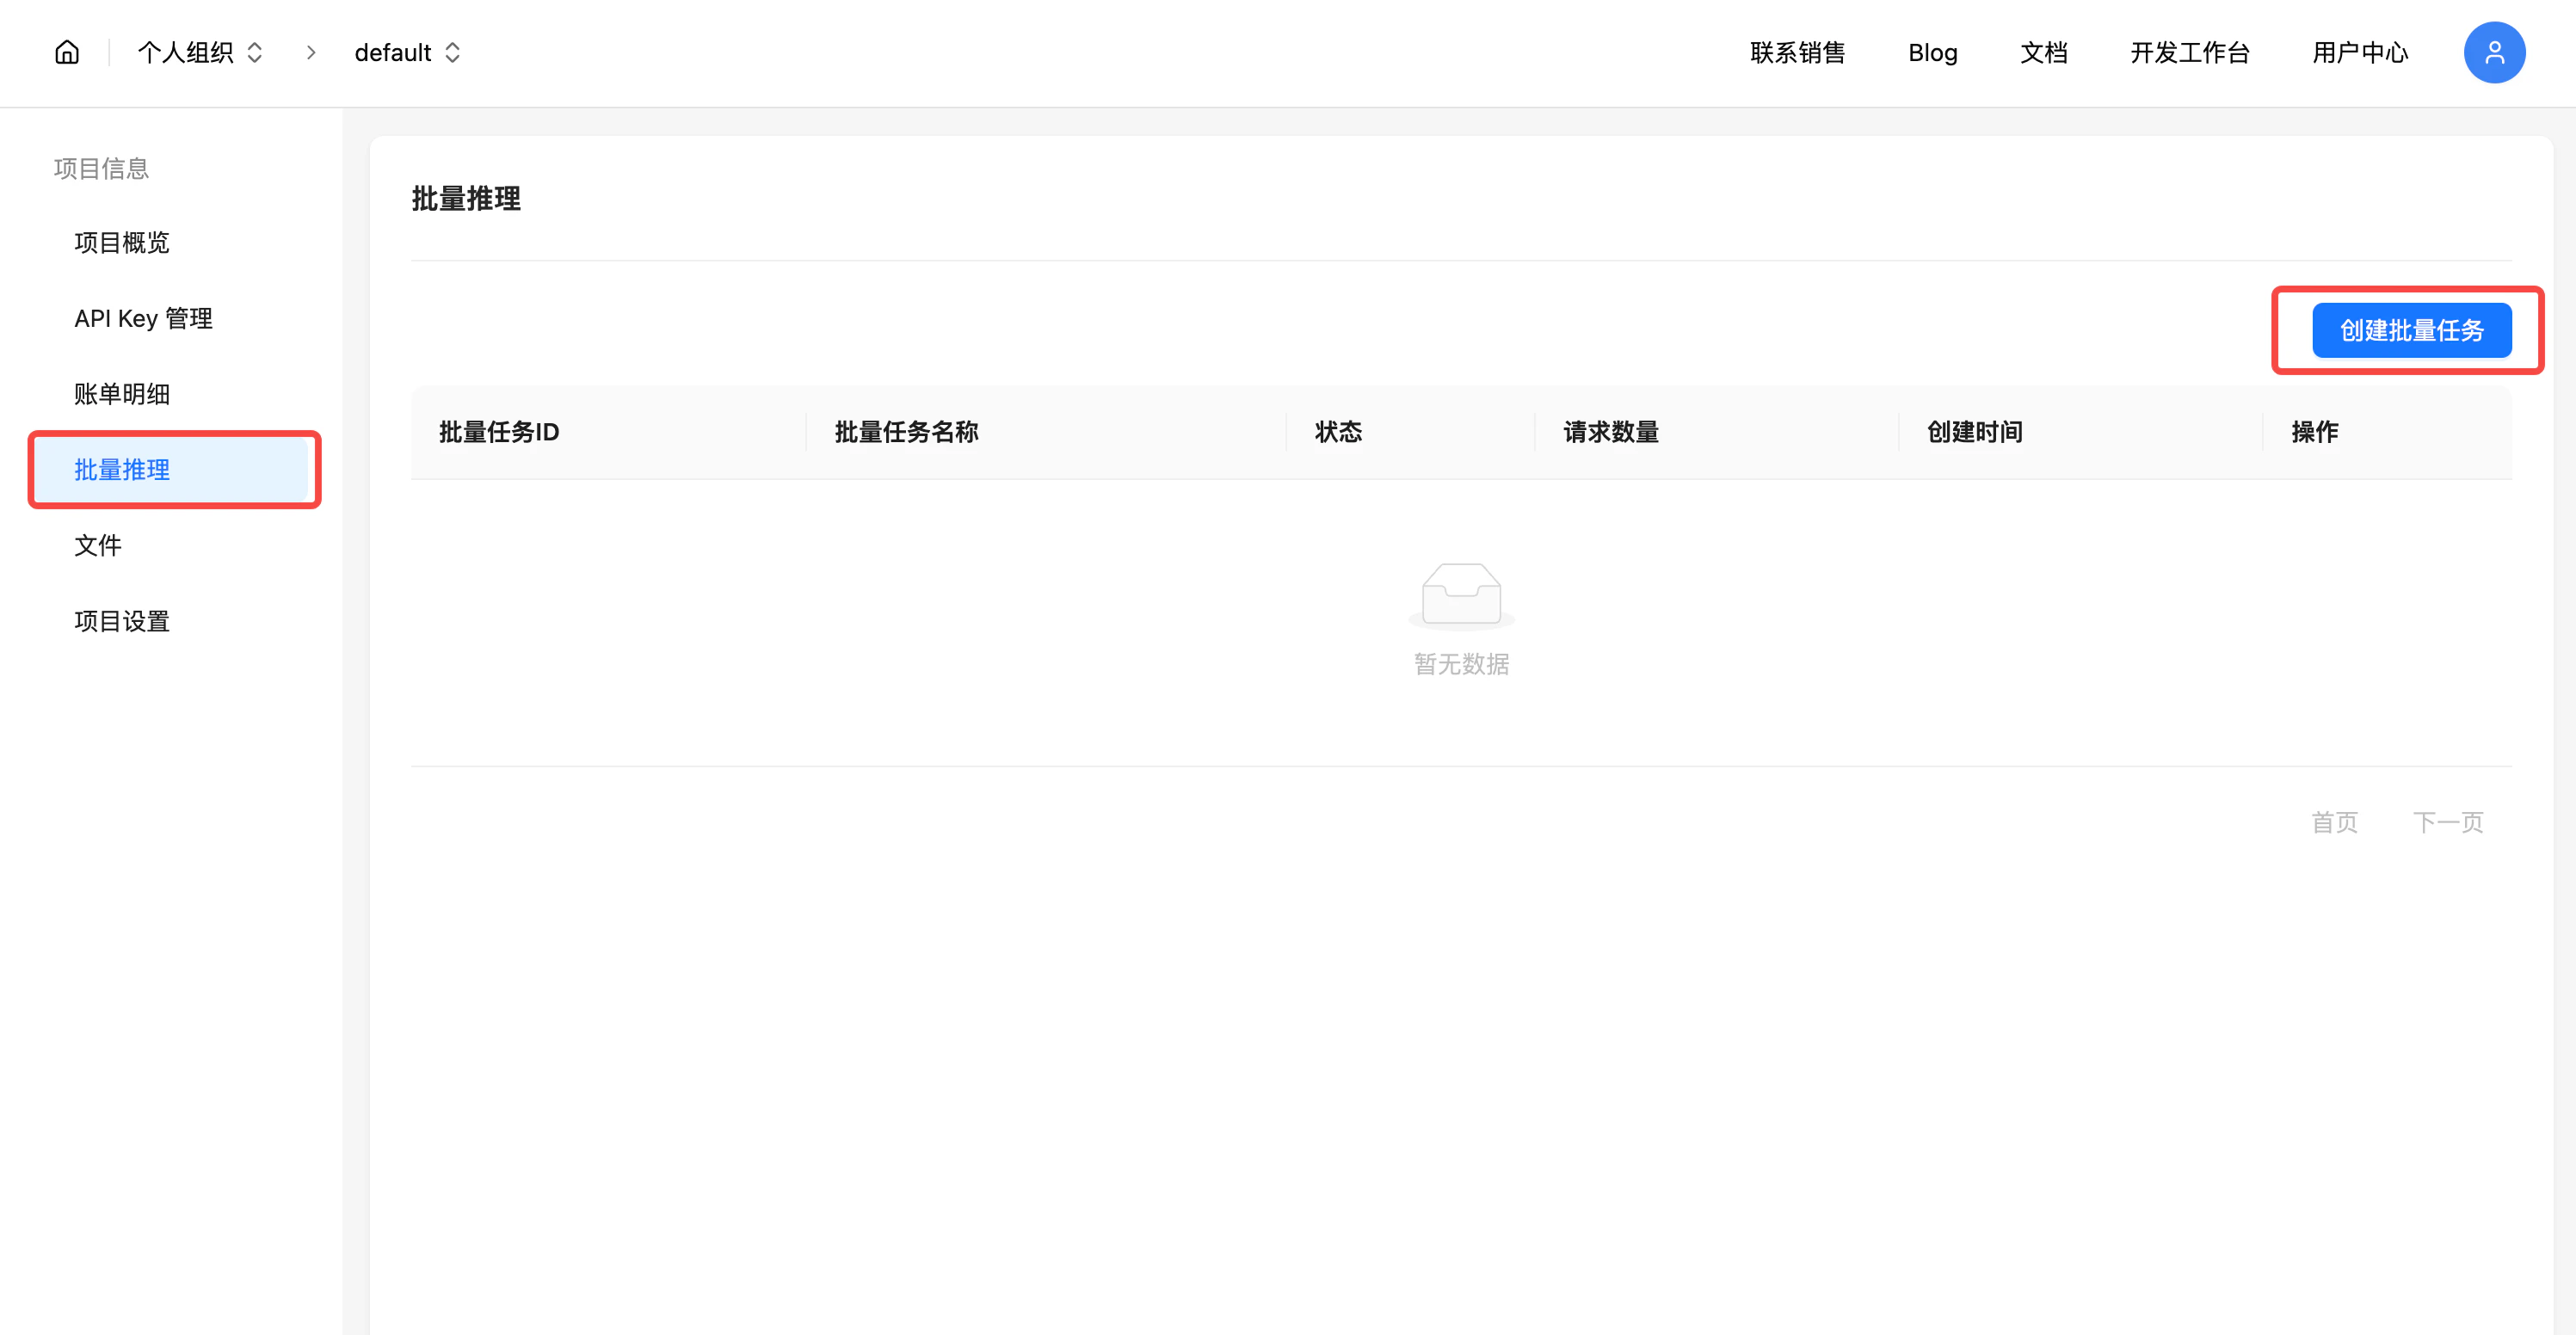
打开 [Kimi 开放平台](https://platform.kimi.com)，进入 **用户中心** → **项目管理** → **查看项目** → **批量推理** → **创建批任务**。
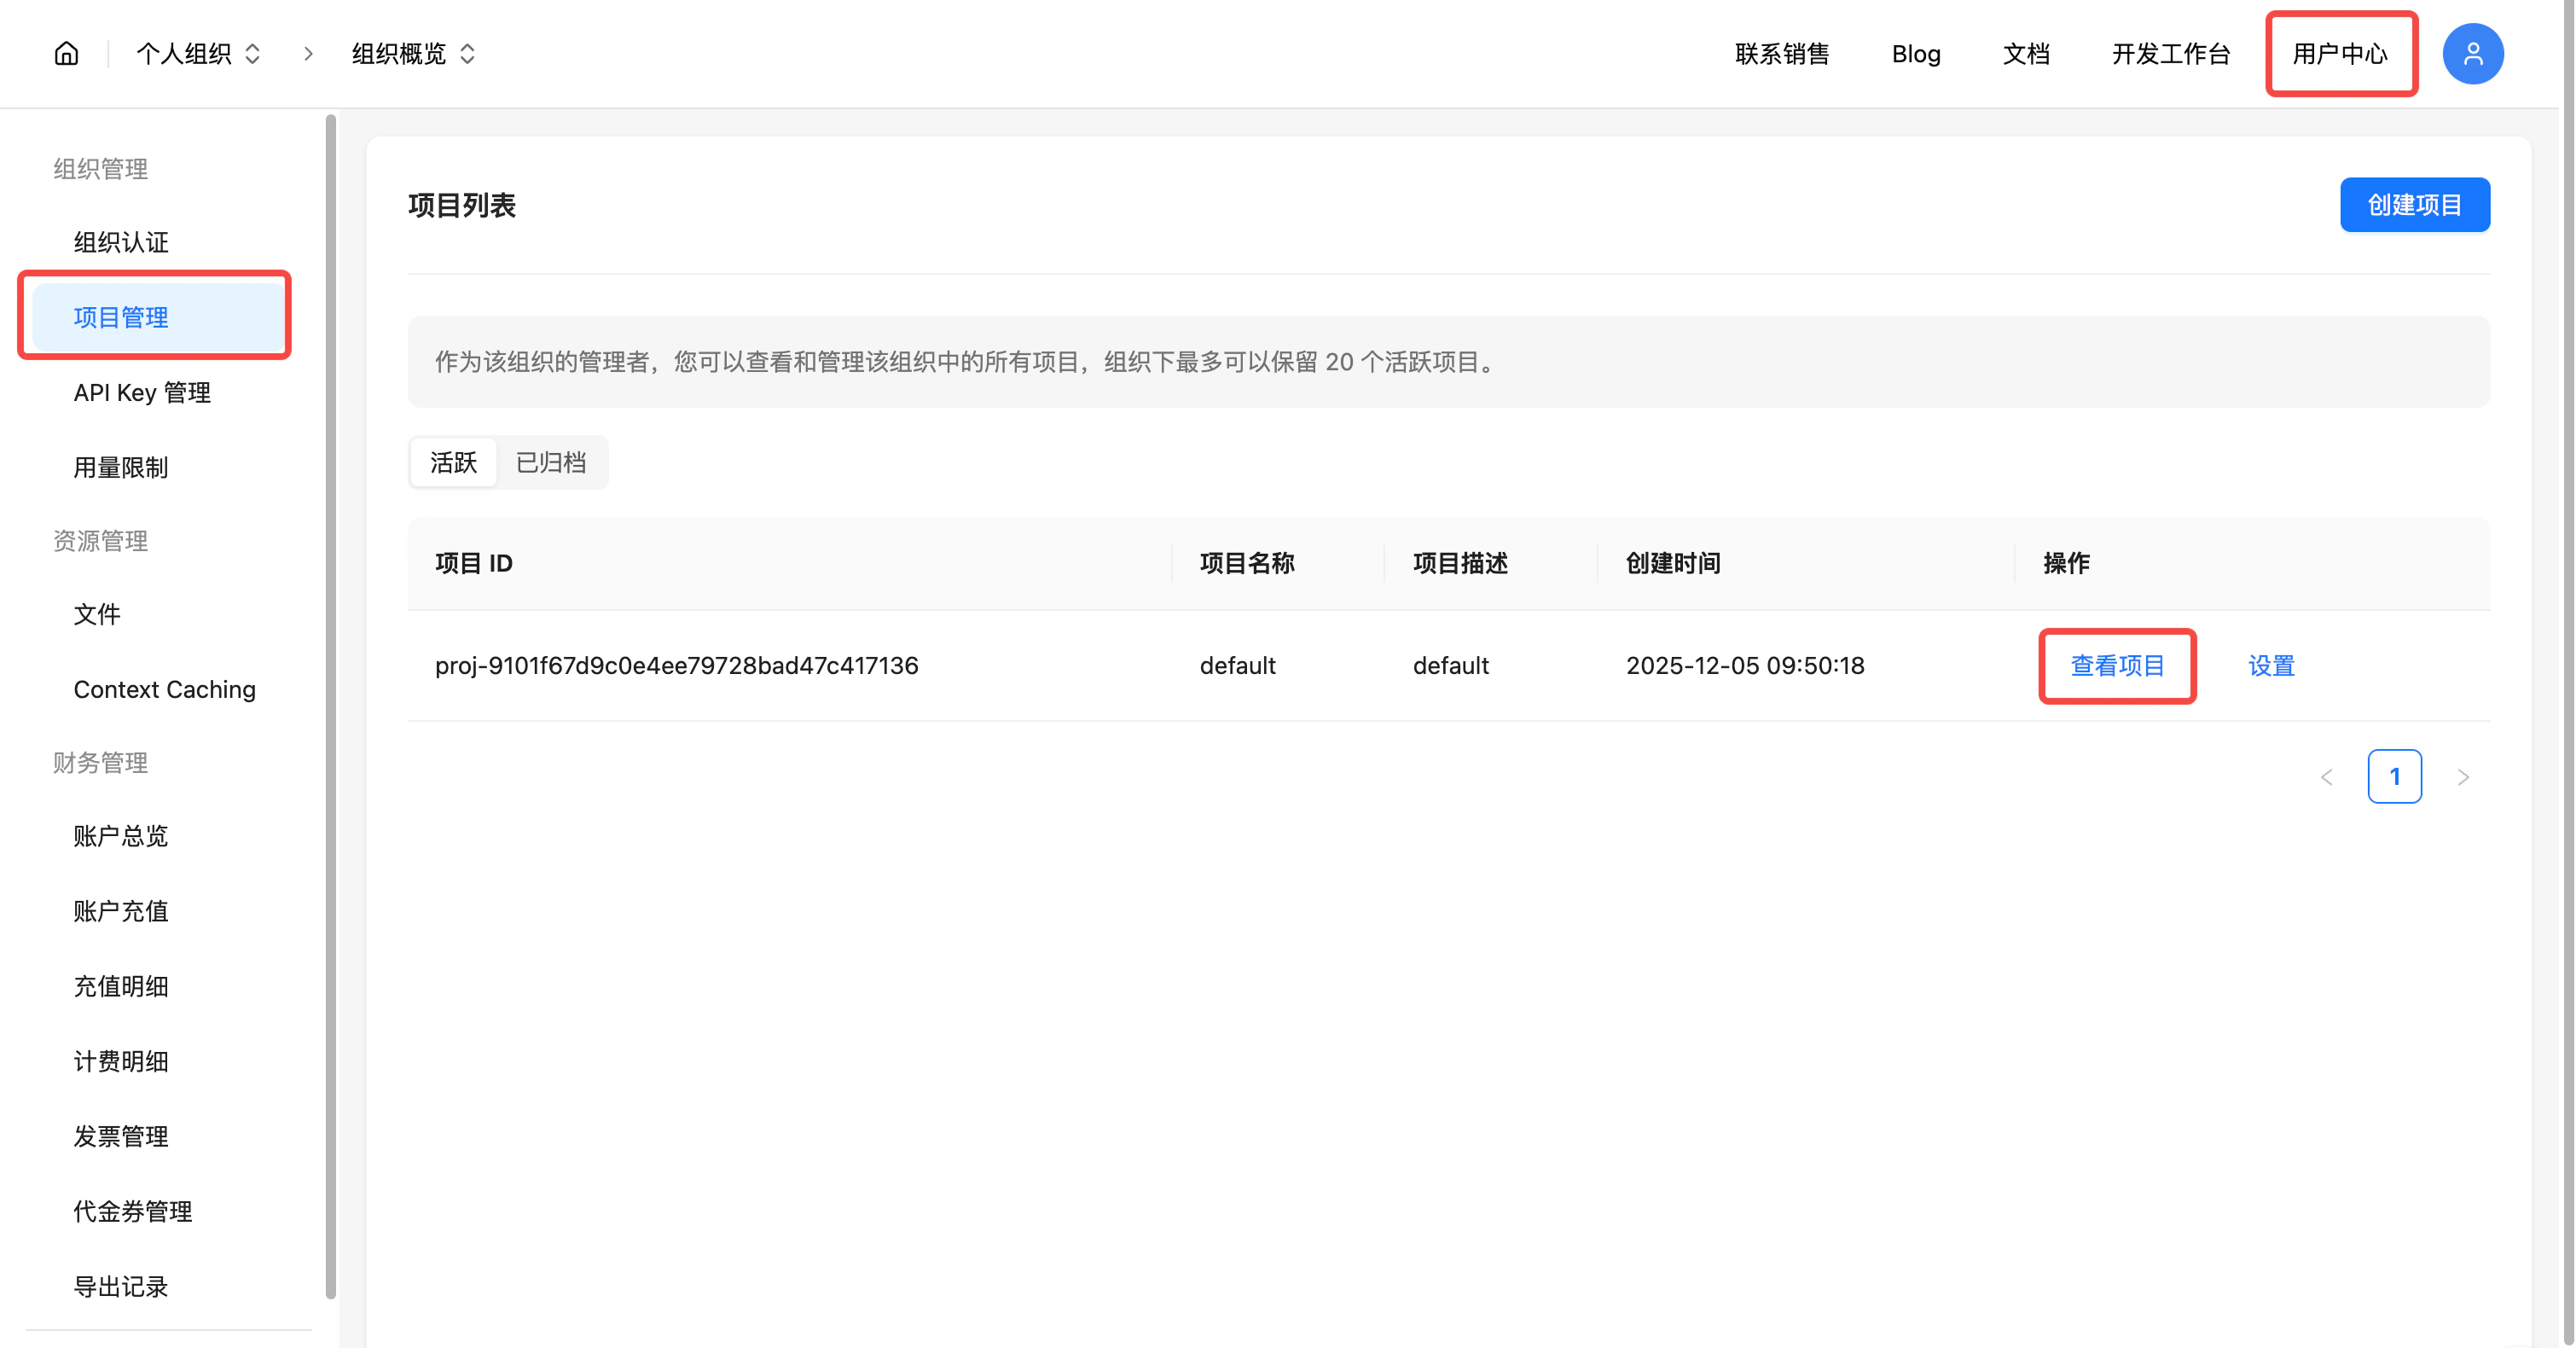
<img src="https://mintcdn.com/moonshotcn/ckop6WO3VZWM-wj0/assets/pics/batch-inference/step1-project-list.png?fit=max&auto=format&n=ckop6WO3VZWM-wj0&q=85&s=4b6d7499bcc4afee0f58b51ffdab060b" alt="项目管理页面" width="3020" height="1580" data-path="assets/pics/batch-inference/step1-project-list.png" />

<img src="https://mintcdn.com/moonshotcn/ckop6WO3VZWM-wj0/assets/pics/batch-inference/step1-batch-page.png?fit=max&auto=format&n=ckop6WO3VZWM-wj0&q=85&s=d28153c2f54b77cd53b9a6c487a2a274" alt="批量推理页面" width="2994" height="1552" data-path="assets/pics/batch-inference/step1-batch-page.png" />

### 2. 配置任务参数

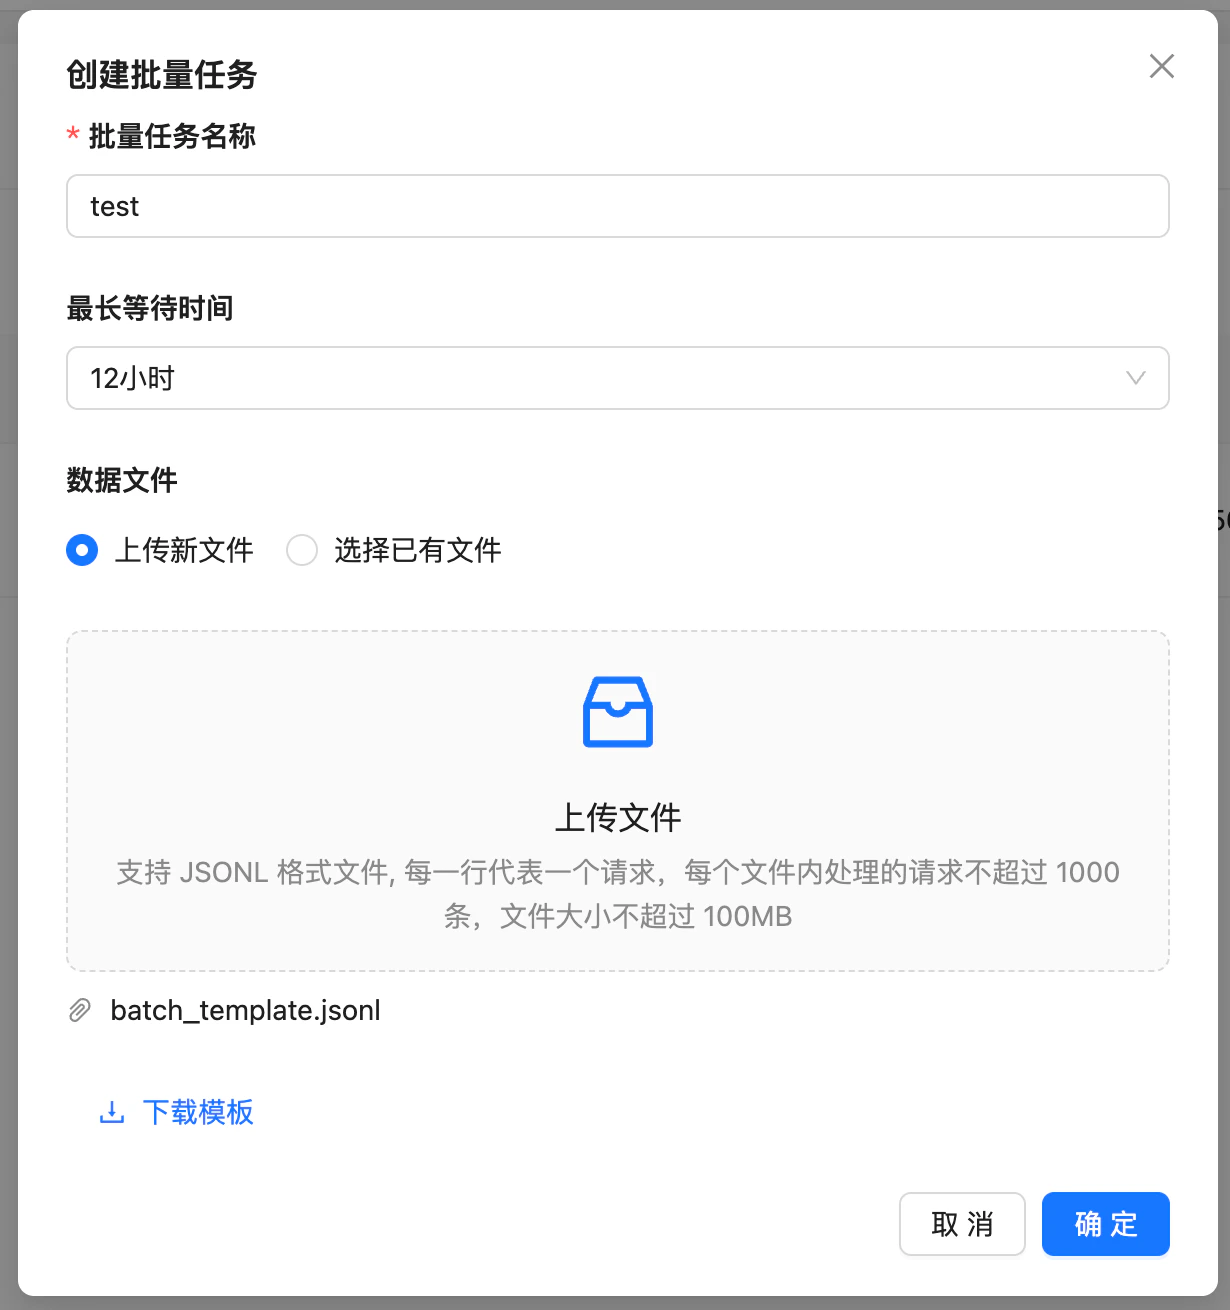
在创建批量任务弹窗中，设置以下信息：

* **批量任务名称**：为任务设置一个名称
* **最长等待时间**：选择任务的最长等待时间
* **数据文件**：上传新文件或选择已有文件

点击 **确定** 提交任务。

<img src="https://mintcdn.com/moonshotcn/ckop6WO3VZWM-wj0/assets/pics/batch-inference/step2-create-task.png?fit=max&auto=format&n=ckop6WO3VZWM-wj0&q=85&s=299cb4f16d1d8a428eb772550f6f0461" alt="创建批量任务" width="1230" height="1310" data-path="assets/pics/batch-inference/step2-create-task.png" />

### 3. 等待推理完成

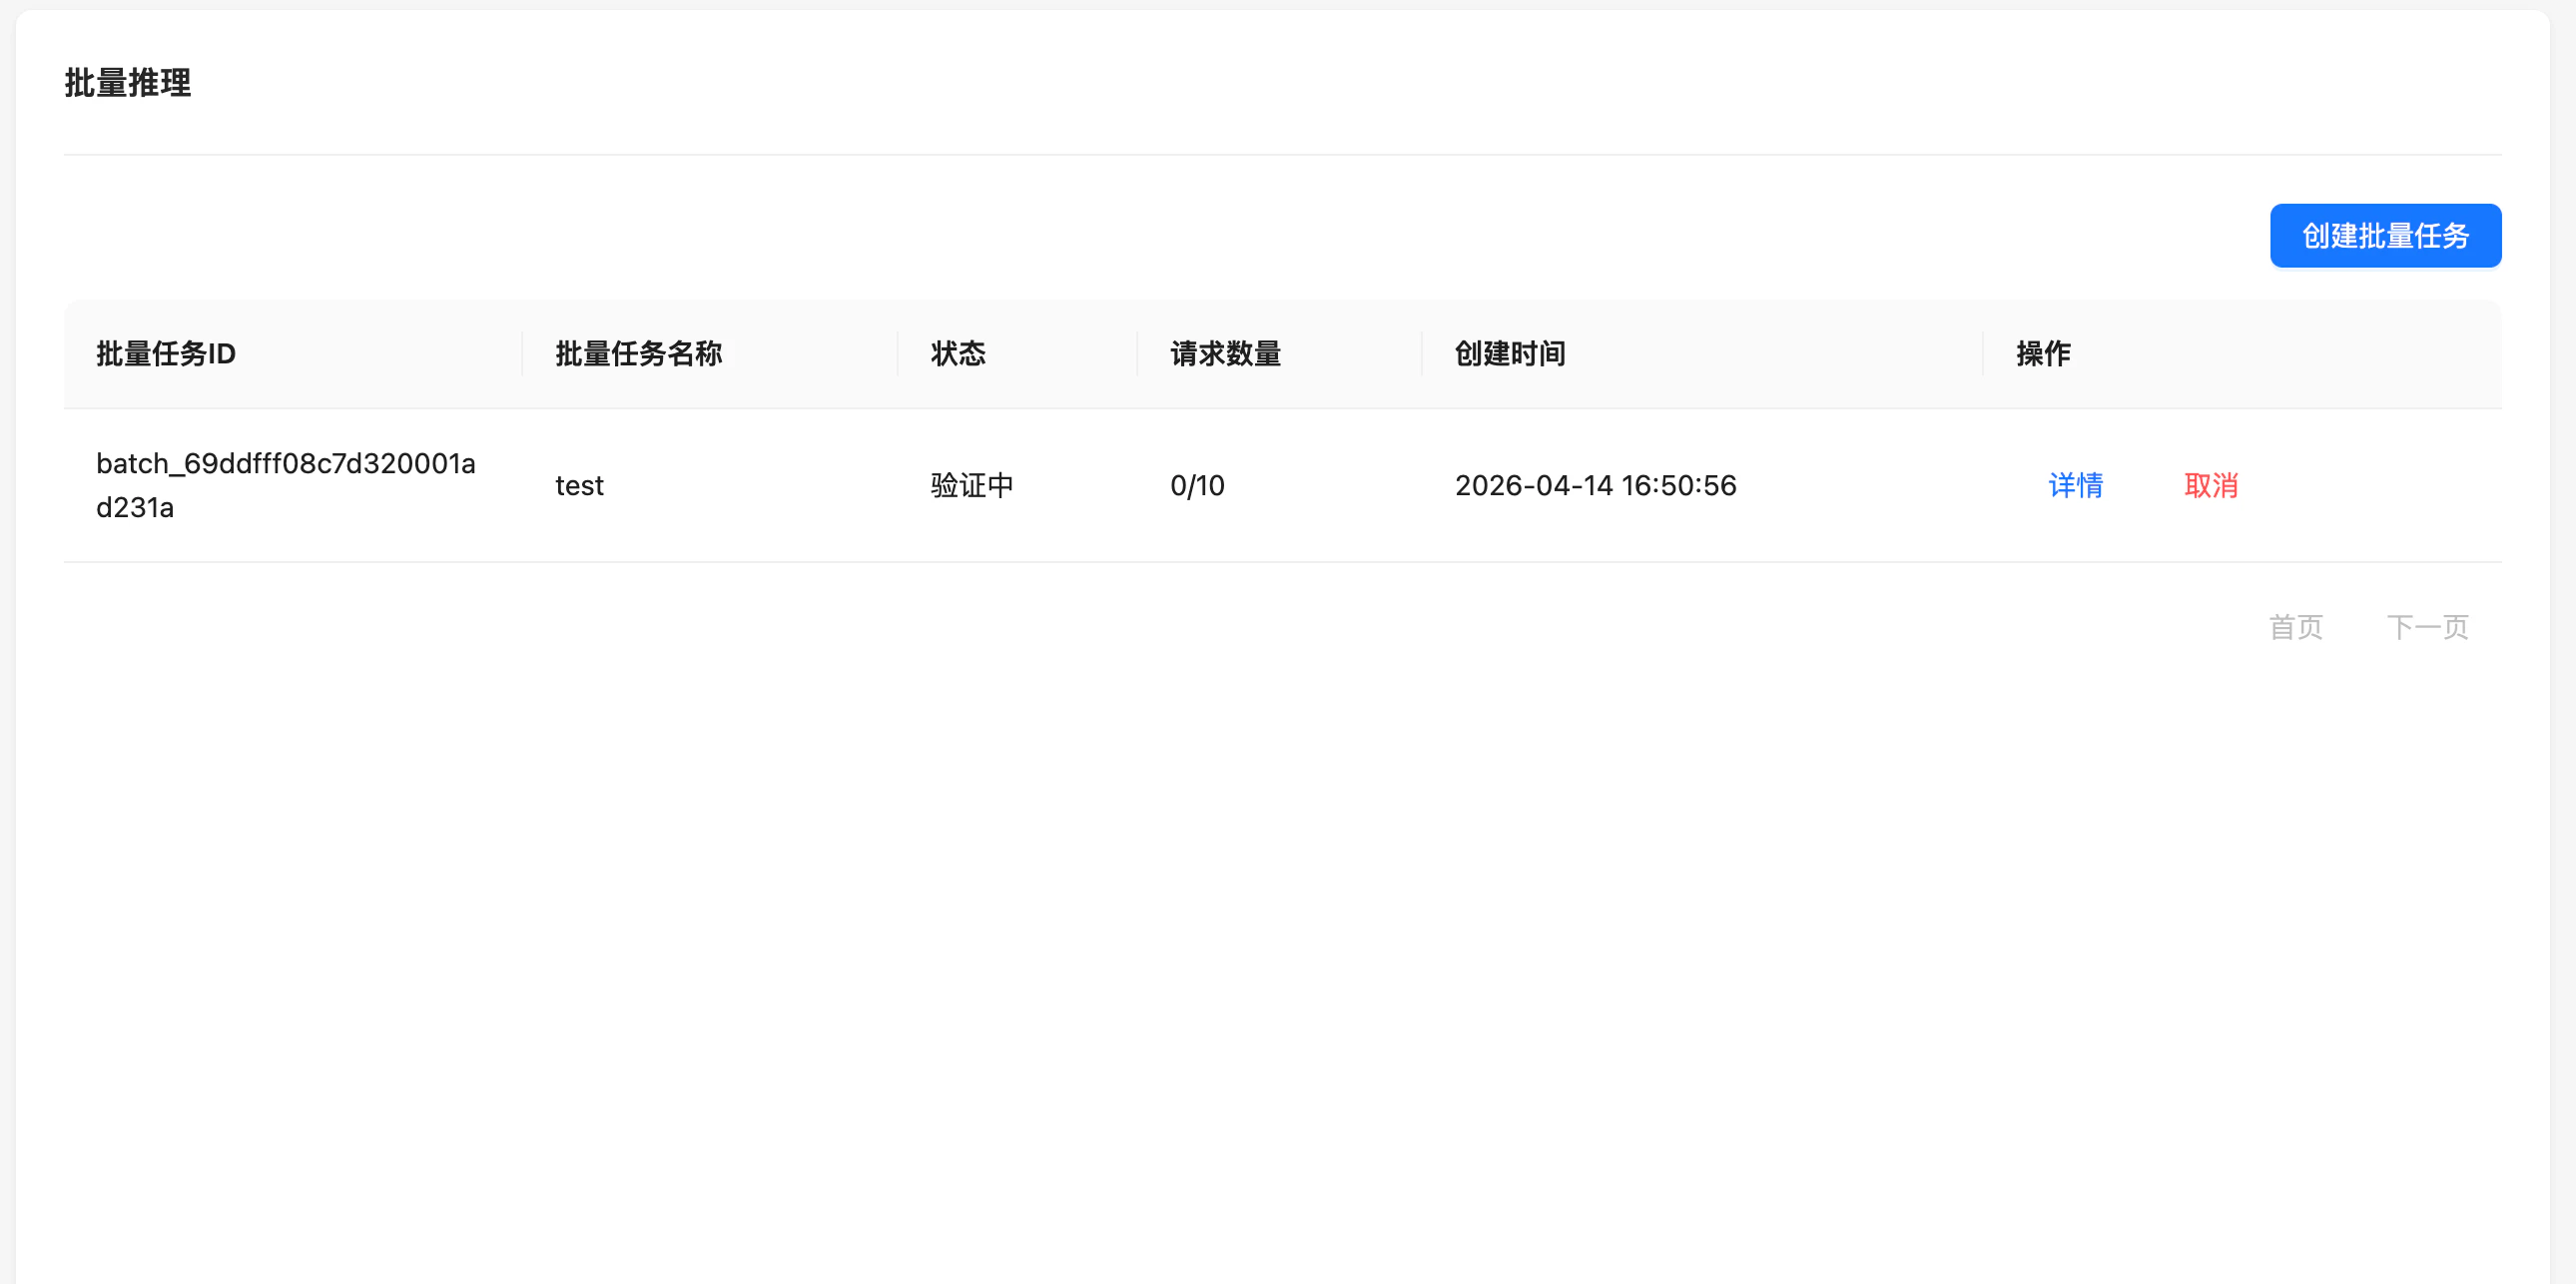
任务提交后将开始执行，你可以在批量推理列表中查看任务状态。

<img src="https://mintcdn.com/moonshotcn/ckop6WO3VZWM-wj0/assets/pics/batch-inference/step3-task-running.png?fit=max&auto=format&n=ckop6WO3VZWM-wj0&q=85&s=def907e419c9a0148f46d6624ede43f9" alt="任务验证中" width="2580" height="1286" data-path="assets/pics/batch-inference/step3-task-running.png" />

### 4. 下载输出结果

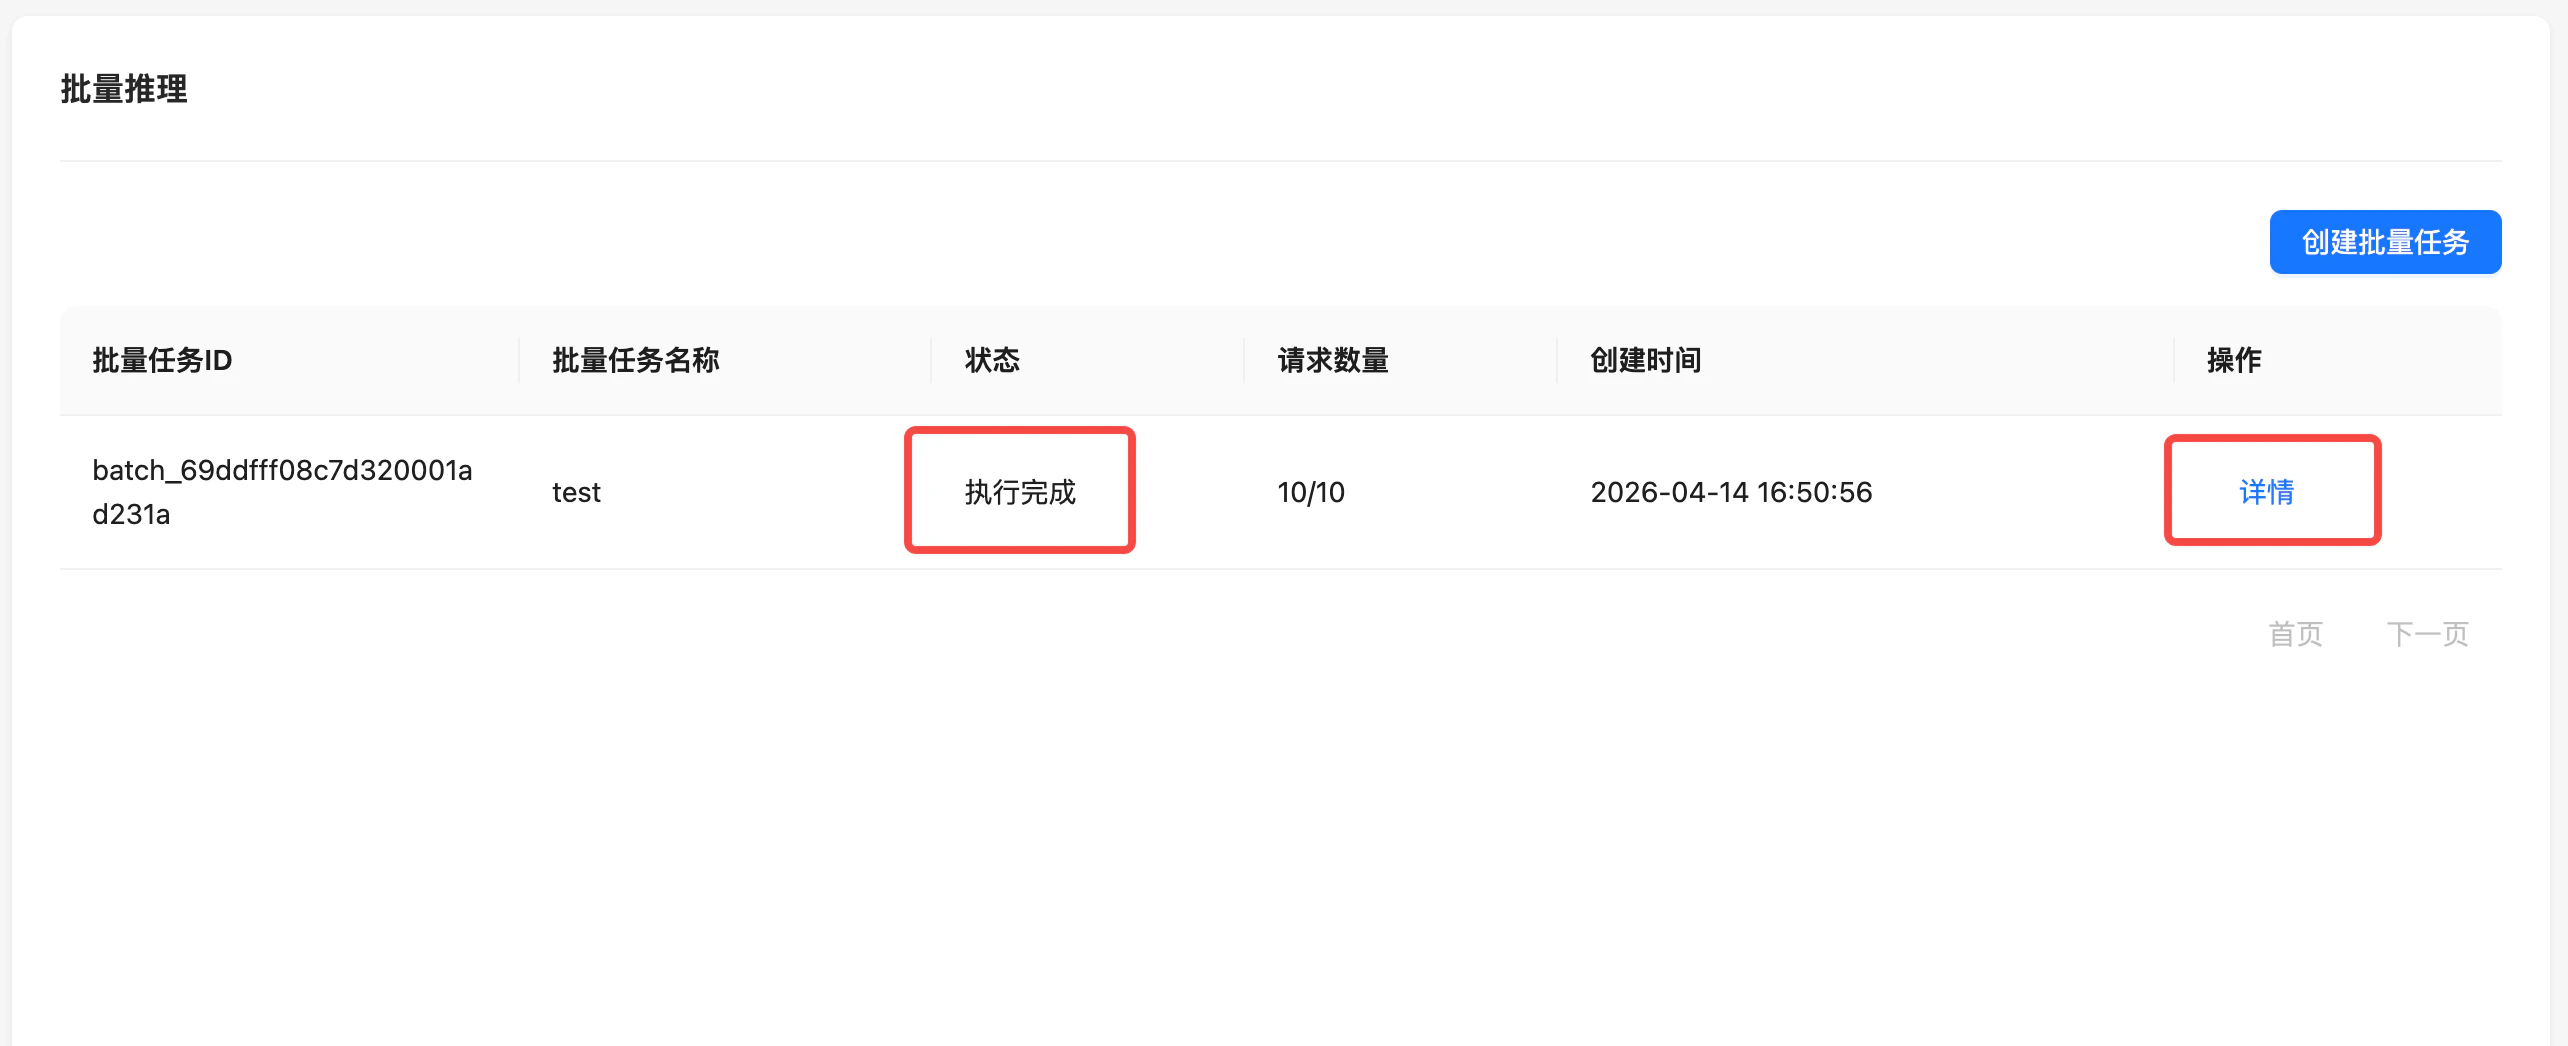
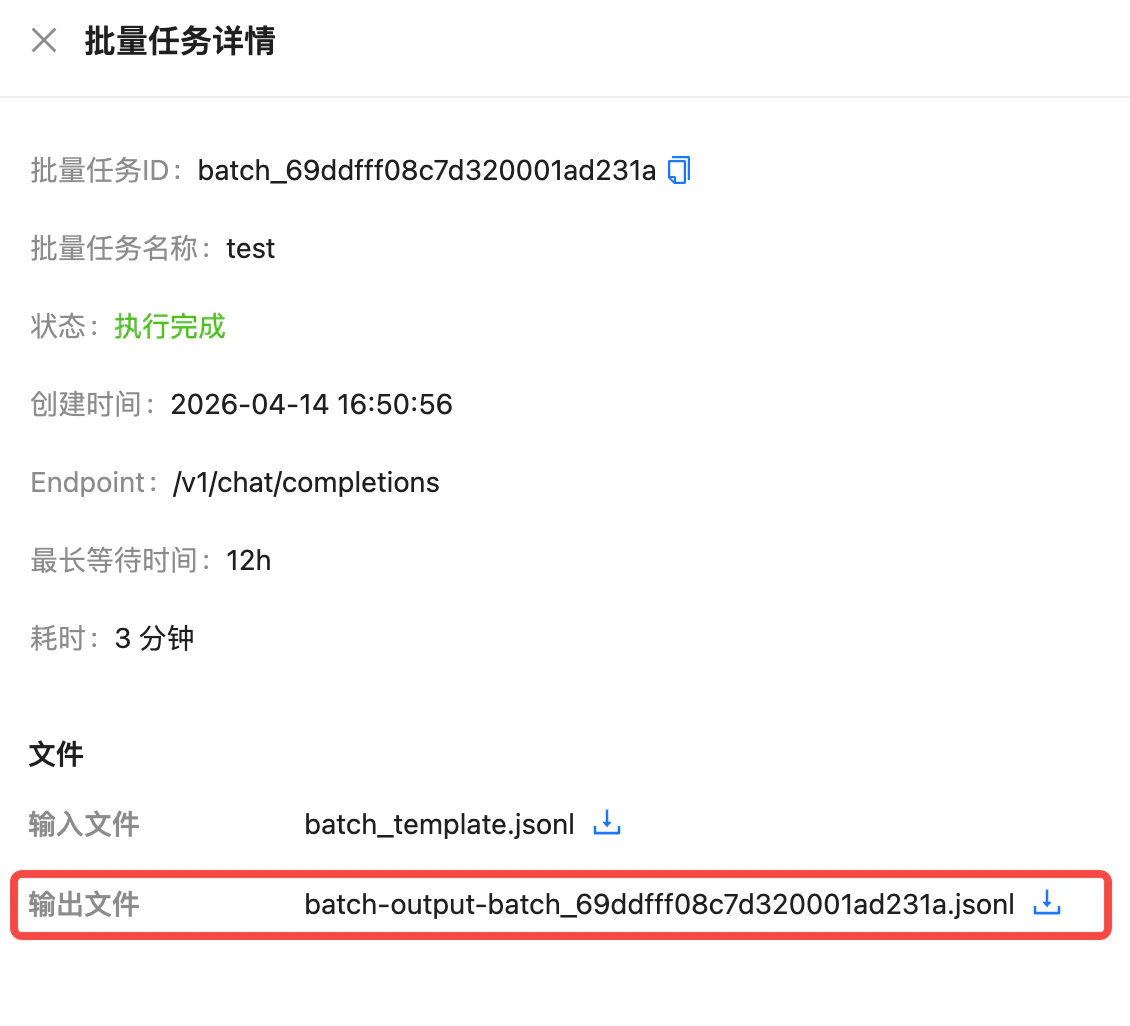
任务执行完成后，点击 **详情** 即可查看任务详细信息并下载输出结果文件。

<img src="https://mintcdn.com/moonshotcn/ckop6WO3VZWM-wj0/assets/pics/batch-inference/step4-task-completed.png?fit=max&auto=format&n=ckop6WO3VZWM-wj0&q=85&s=9bc95c94c6220fea7f8edbb90452fdfc" alt="任务执行完成" width="2568" height="1046" data-path="assets/pics/batch-inference/step4-task-completed.png" />

<img src="https://mintcdn.com/moonshotcn/ckop6WO3VZWM-wj0/assets/pics/batch-inference/step4-task-details.png?fit=max&auto=format&n=ckop6WO3VZWM-wj0&q=85&s=67084ce34bf79277e7ac2cb70da0ec8d" alt="批量任务详情" width="1130" height="1026" data-path="assets/pics/batch-inference/step4-task-details.png" />

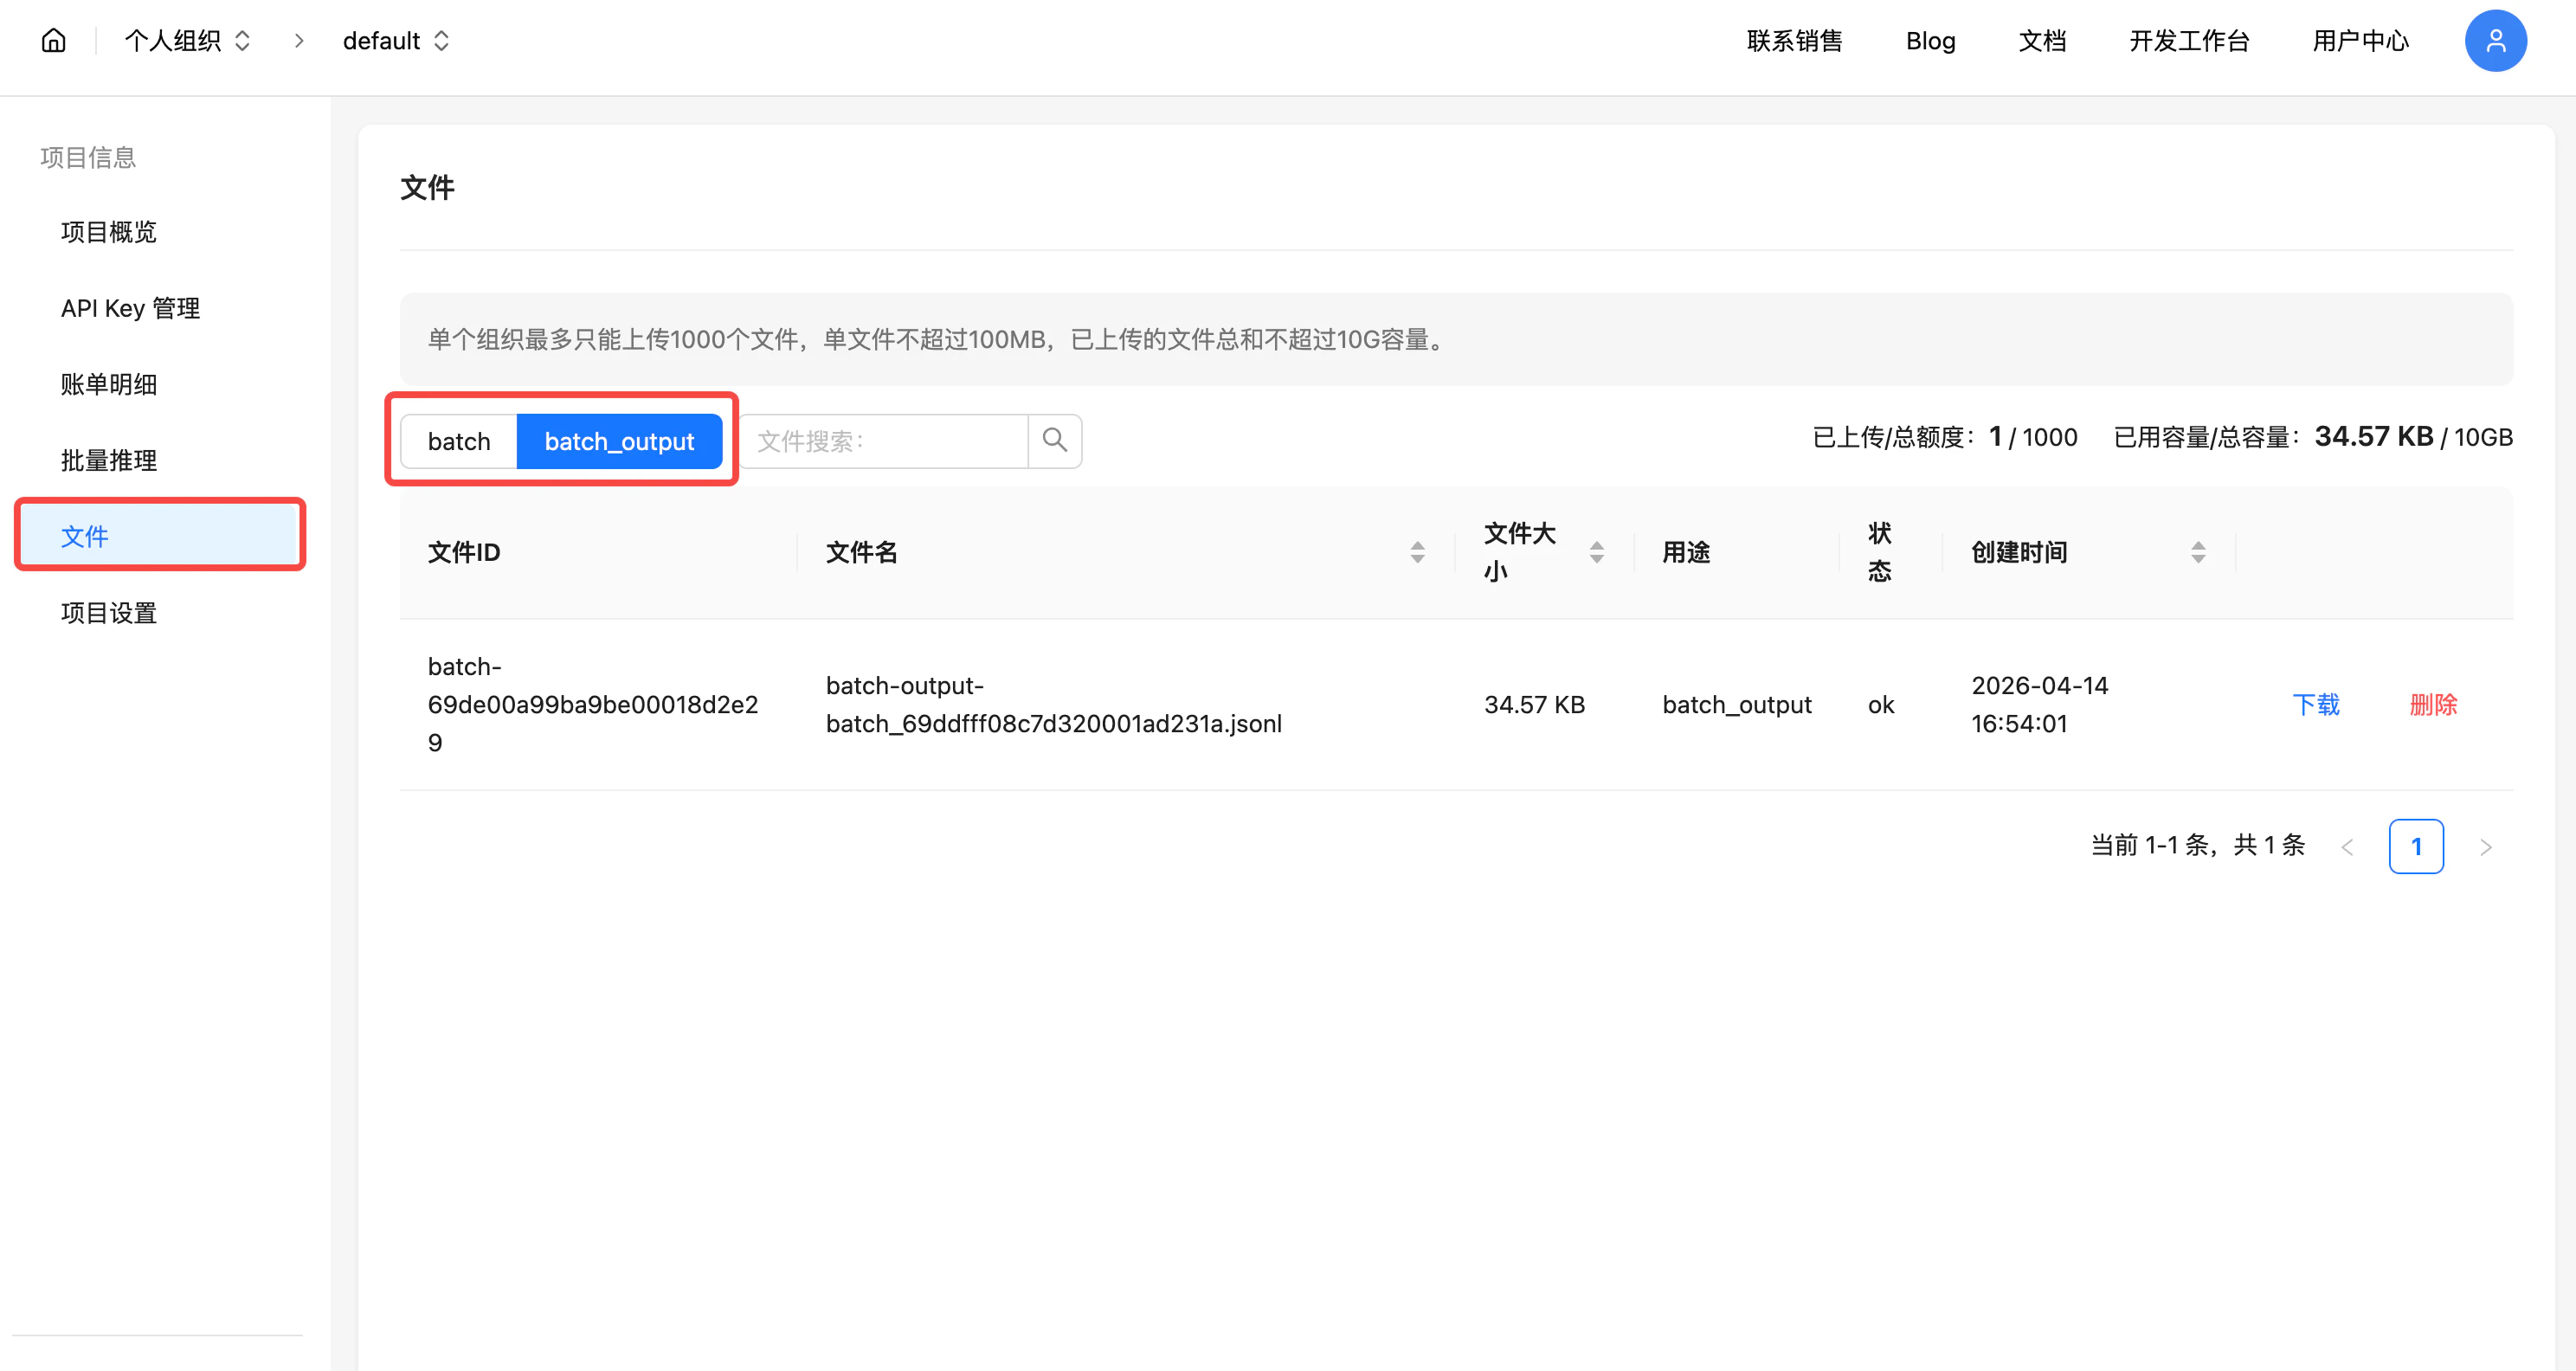
### 5. 查看历史文件

你也可以在项目的 **文件** 页面中找到历史上传的输入文件和输出结果文件。
<img src="https://mintcdn.com/moonshotcn/ckop6WO3VZWM-wj0/assets/pics/batch-inference/step5-files.png?fit=max&auto=format&n=ckop6WO3VZWM-wj0&q=85&s=fbc01728253365003bdd8e72f466fde4" alt="文件列表" width="2976" height="1584" data-path="assets/pics/batch-inference/step5-files.png" />